Table of Contents
In this blog post, we will explore the steps to deploy Microsoft Store apps using Intune. A new app deployment type called Microsoft Store apps (new) is now available in the Intune admin center. This option allows us to search for store apps and deploy them directly.
Applications deployed using this method will be updated. The Microsoft Store supports various types of applications, including UWP apps, desktop apps packaged in .msi format, and Win32 packaged in .exe or .msi installers.
To deploy Store apps using Intune, you must meet these prerequisites:
- Client devices must support at least two core processors to successfully install and run Microsoft Store apps.
- Client device need to be able to support the Intune Management Extension (IME) to install Microsoft Store apps.
- Client devices need access to both the Microsoft Store and the destination content to install Microsoft Store apps. For more information, see Microsoft Store proxy configuration.
Microsoft Store app (legacy) vs Microsoft Store app (new)
The Microsoft Store (legacy) is an older for deploying Microsoft Store apps using Intune. With this legacy method, app link or URL must be provided during the app creation process. Unlike newer methods, this legacy approach does not integrate direct search capability within Intune.
The Microsoft Store app (new) deployment method offers significant improvements over the legacy method. Some of these improvements include:
- Browse and search for store apps within Intune.
- Install and uninstall with the required app deployments.
- Monitor the installation progress and results for store apps.
- Win32 store apps are also supported.
- System context and user context are supported for UWP apps.
Deploy Microsoft Store Apps using Intune
1. Head over to Microsoft Intune Admin Center then sign-in using an administrative account.
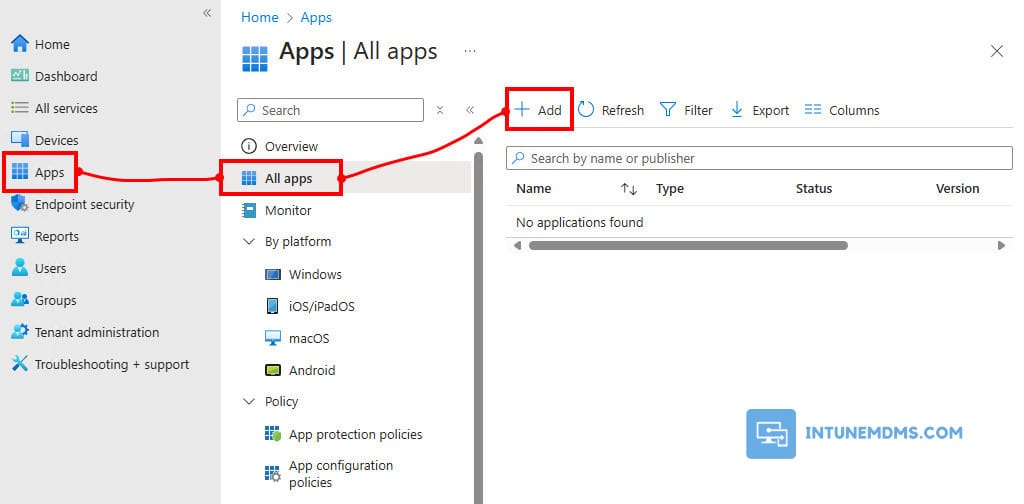
2. Select Apps → All Apps → + Add.
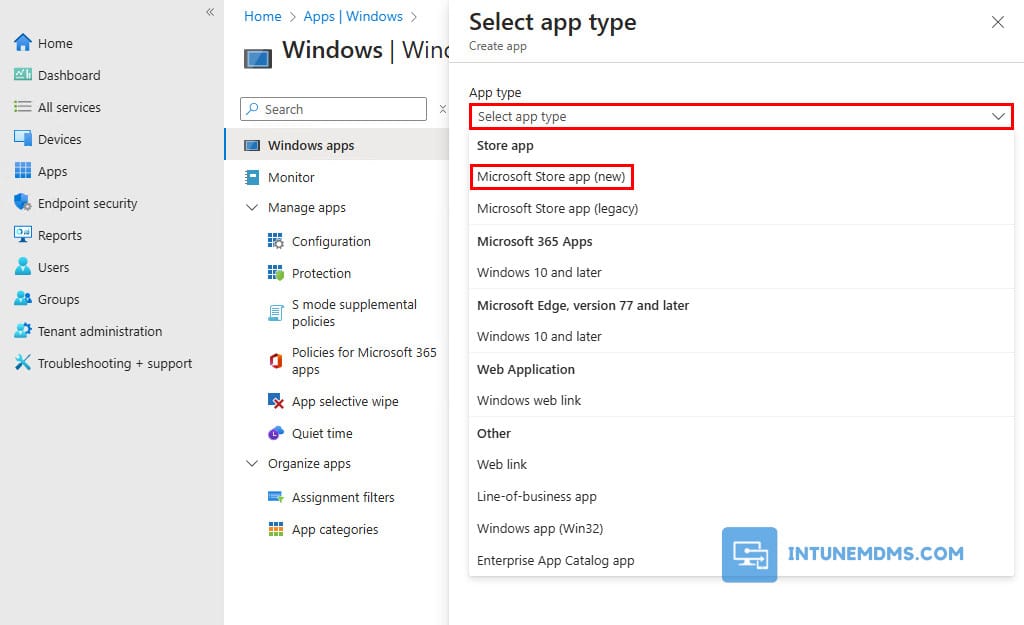
3. On the Select app type pane, under the Store app types, select Microsoft Store app (new).
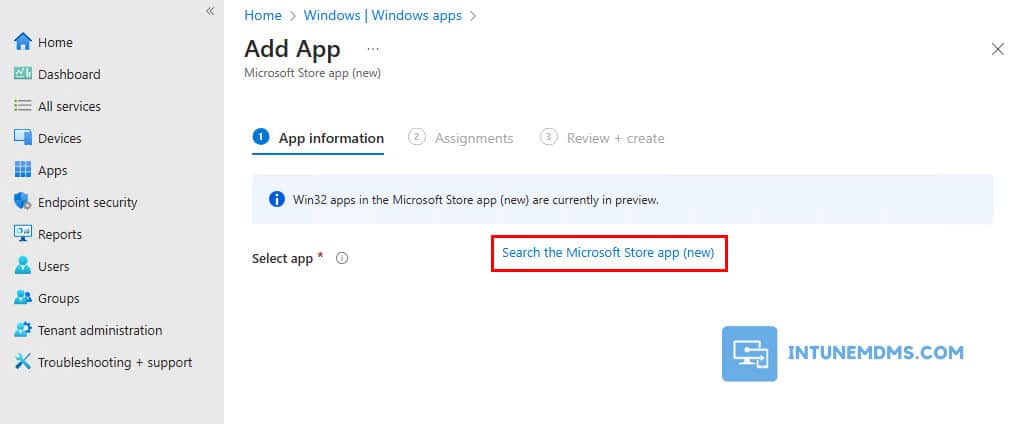
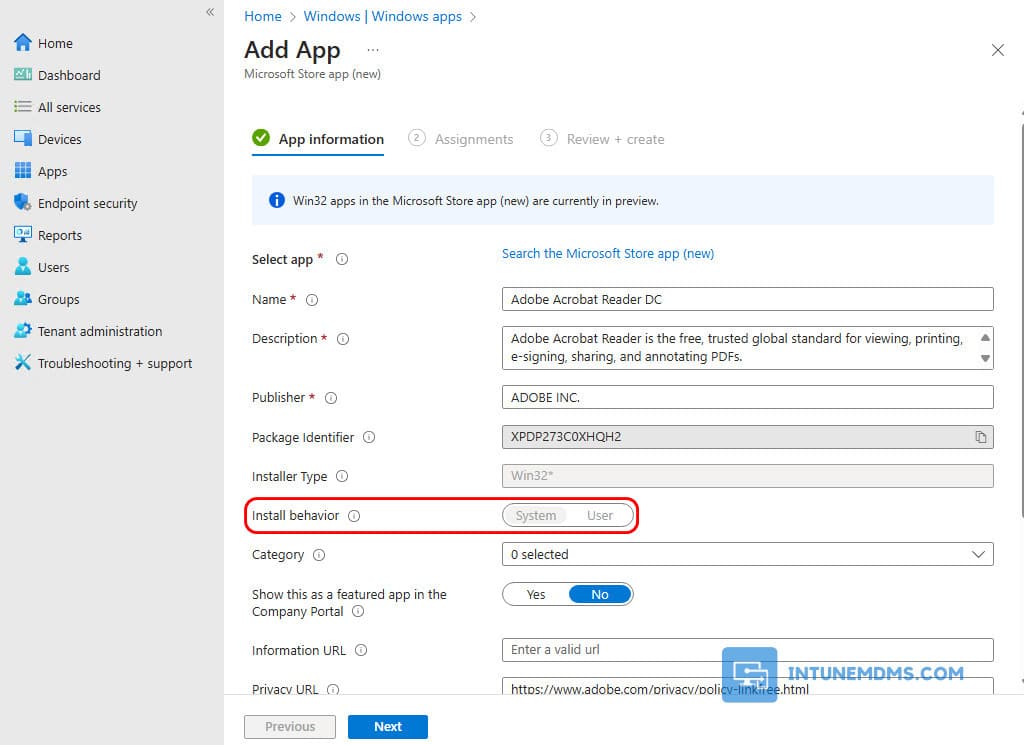
4. In the App Information tab, Click on Search the Microsoft Store app (new) to search for any store application.
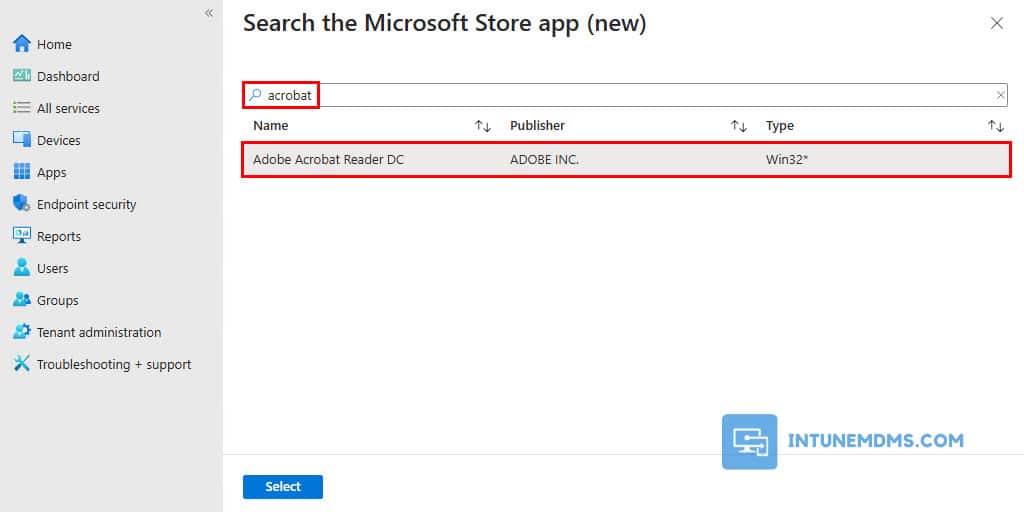
5. Type the name of the app you want to search, and press Enter. Select the app from the search results. For example, I will install the Acrobat Reader app.
6. Once the app is selected, most of the information related to it will auto filled, including the Name, Publisher, Description, etc. You have the option to modify some of this information if desired.
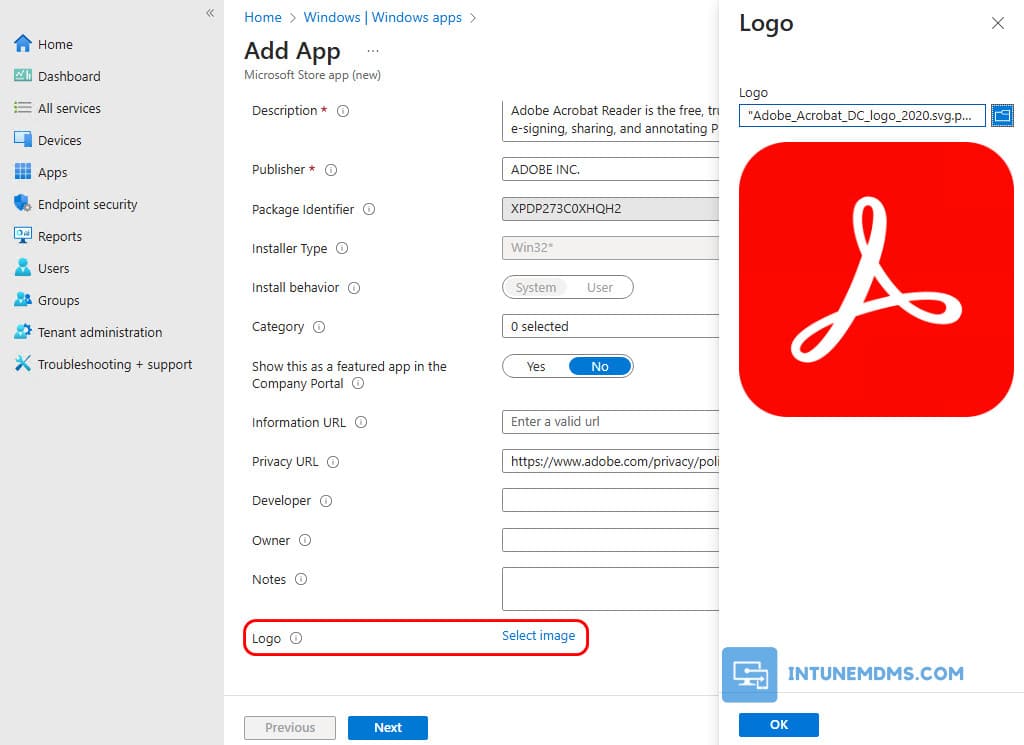
7. Optionally, you can specify the application logo to help users identify the app in the Company Portal. If you use the Available for Enrolled Devices option, the app won’t install automatically but will be available for installation via the Company Portal.
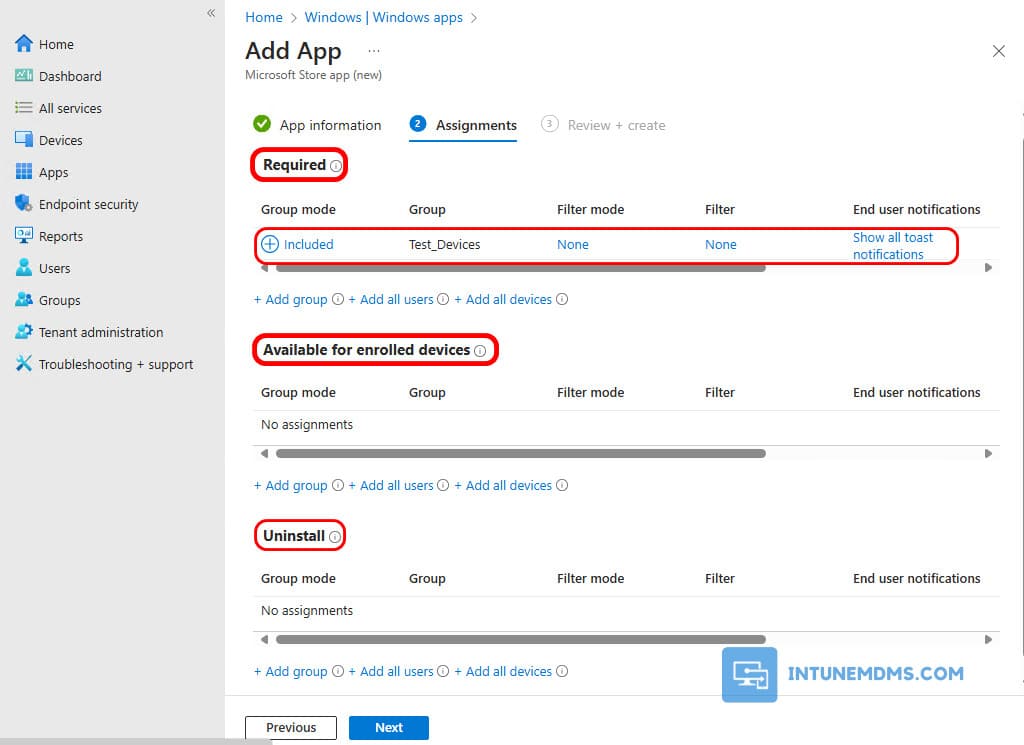
8. On the Assignments tab, you can select the Required, Available for enrolled devices, or Uninstall group assignments for the app. The options are explained below:
- Required: The Win32 app is installed on devices in the selected groups.
- Available for enrolled devices: Users install the Win32 app from the company portal app.
- Uninstall: The Win32 app is uninstalled from devices in the selected groups.
Related post: Understanding App Assignments Using Microsoft Intune.
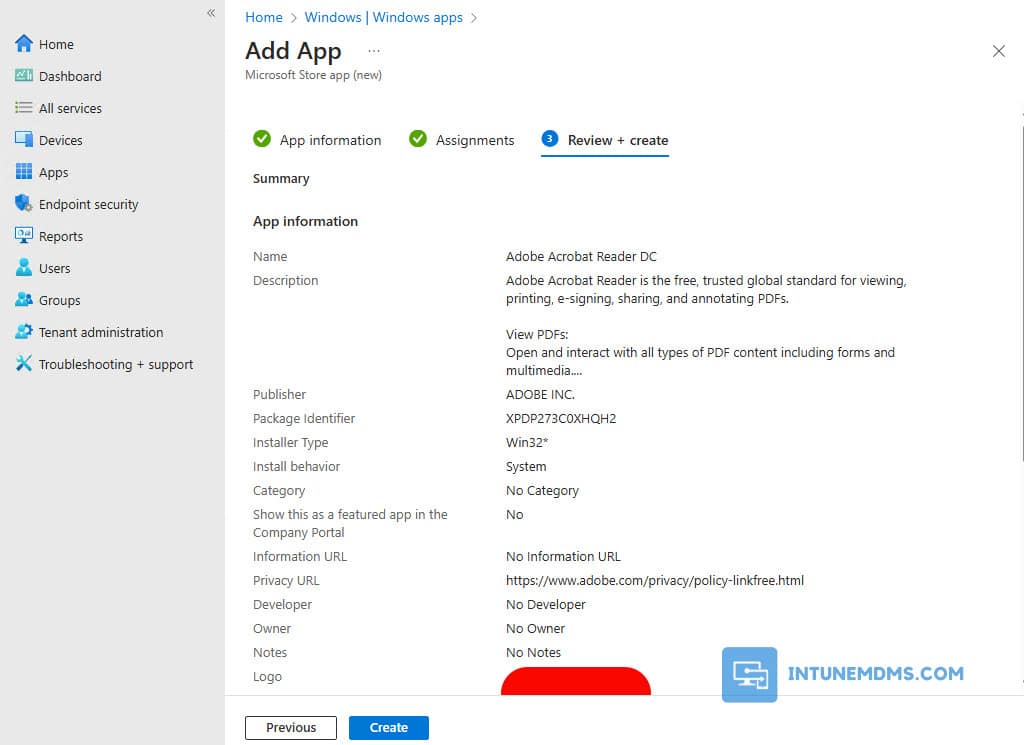
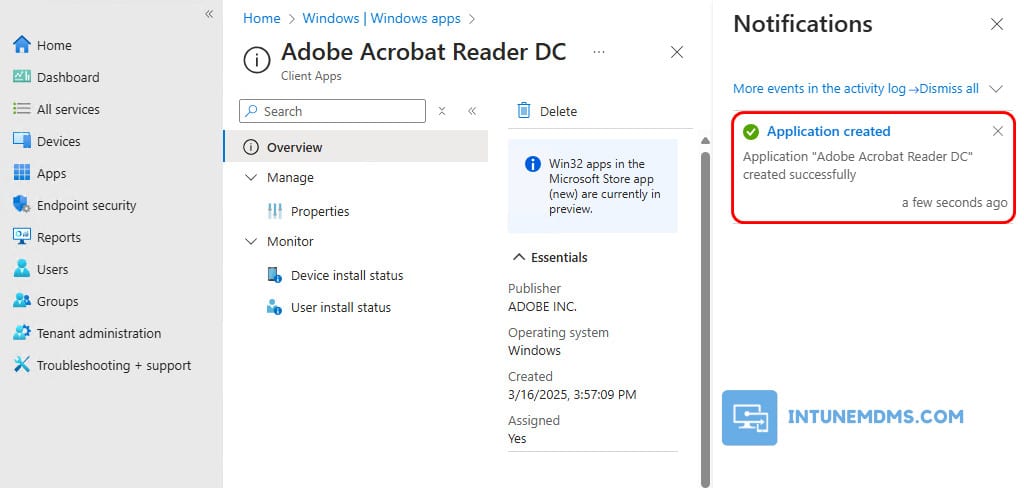
9. On the Review + Create tab, review the app and click on Create.
Tracking the app deployment in Microsoft Intune
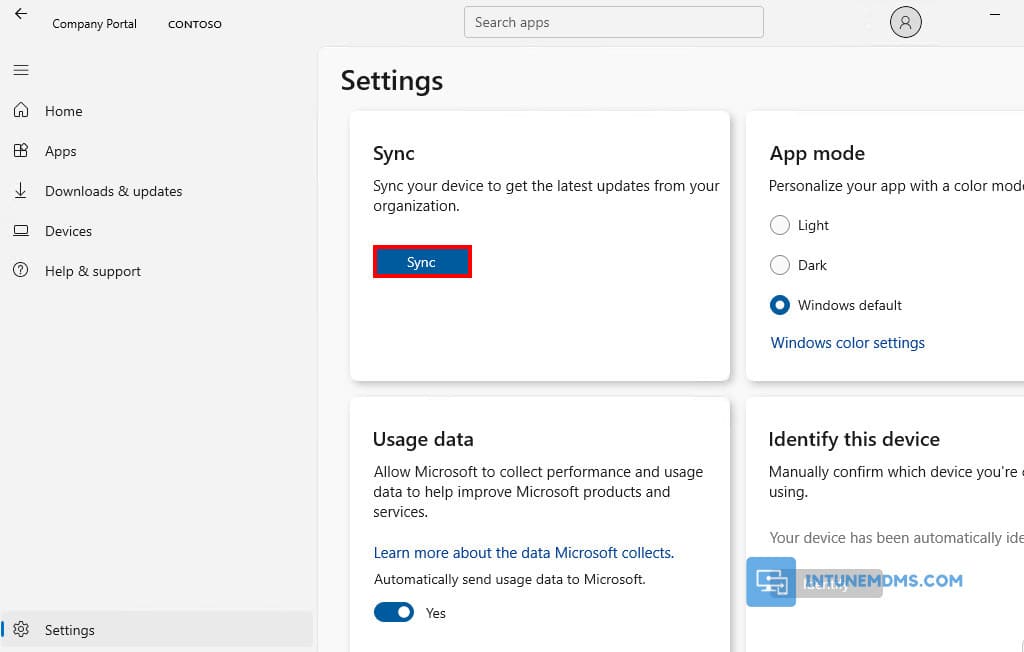
The device check-in process may not begin immediately. If you’re testing this policy on a test device, you can manually initiate an Intune sync by using Windows Settings, PowerShell, or the Company Portal app directly on the device. Additionally, restarting the device can also trigger the Intune device check-in process, ensuring policies and configurations are refreshed.
1. For example, I will manually sync the policy using the Company Portal app.
Related post: How To Sync Intune Policies on Windows Devices Manually.
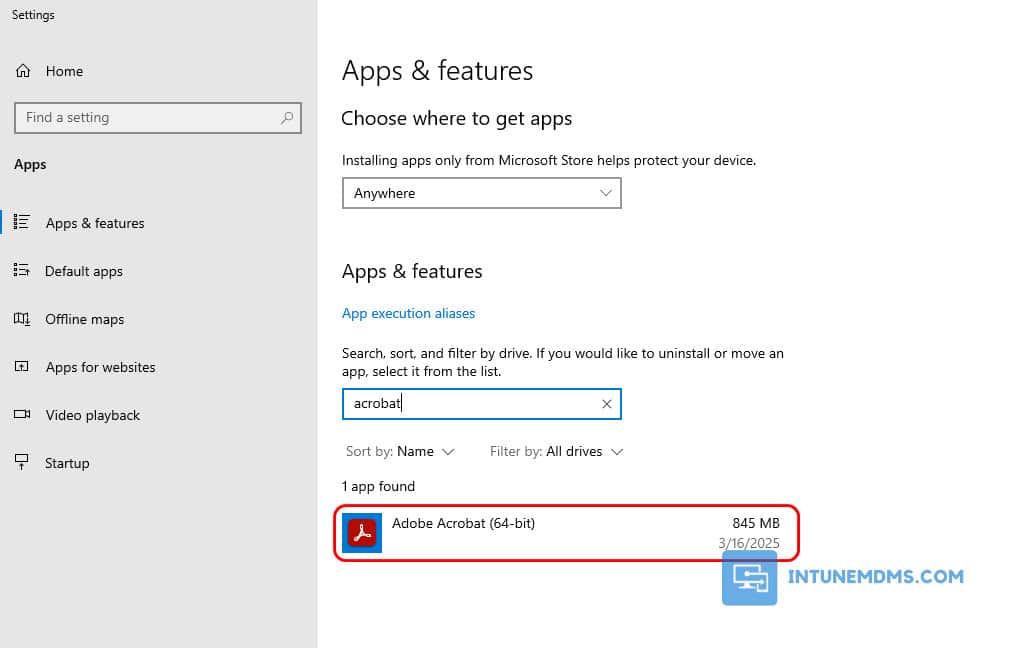
2. On a managed device, you can verify if the app was installed successfully by checking the list of installed applications on the device. The app should appear in the list, confirming that the deployment was completed.
When deploying applications with Intune, you can monitor the deployment status and track installation progress in real time. Intune provides comprehensive reports and logs, enabling you to troubleshoot any issues that may arise during deployment and ensure the app is installed successfully.
Related post: How To Access and Read Intune Management Extension Logs
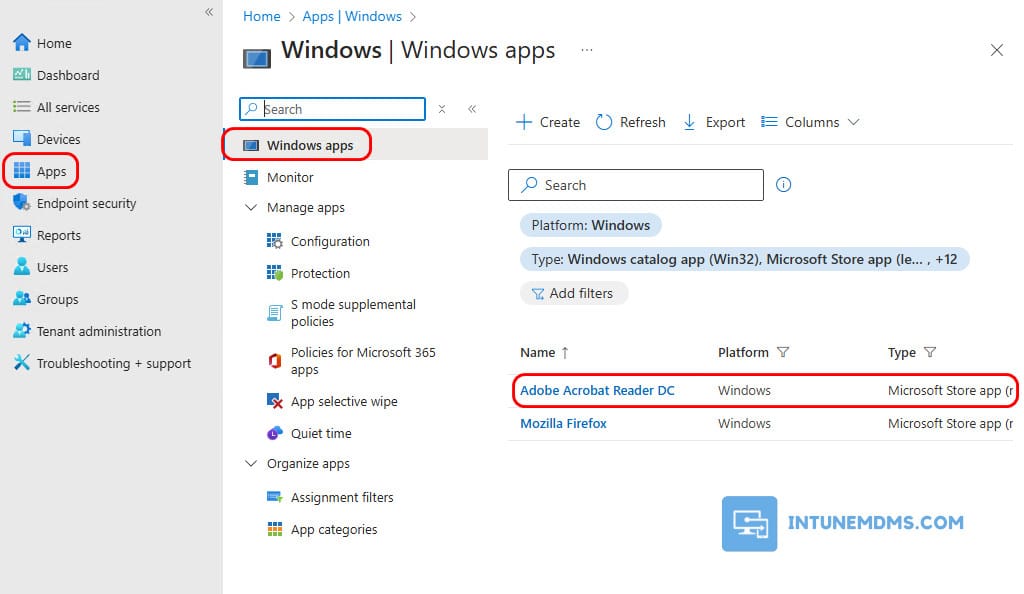
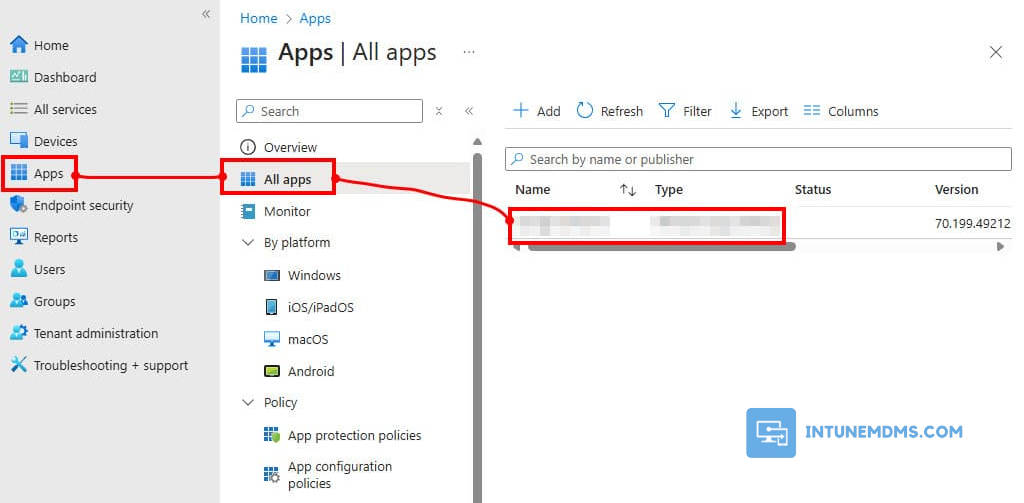
3. To check the app deployment status within the Microsoft Intune portal, go to the Apps section and select the app from the list.
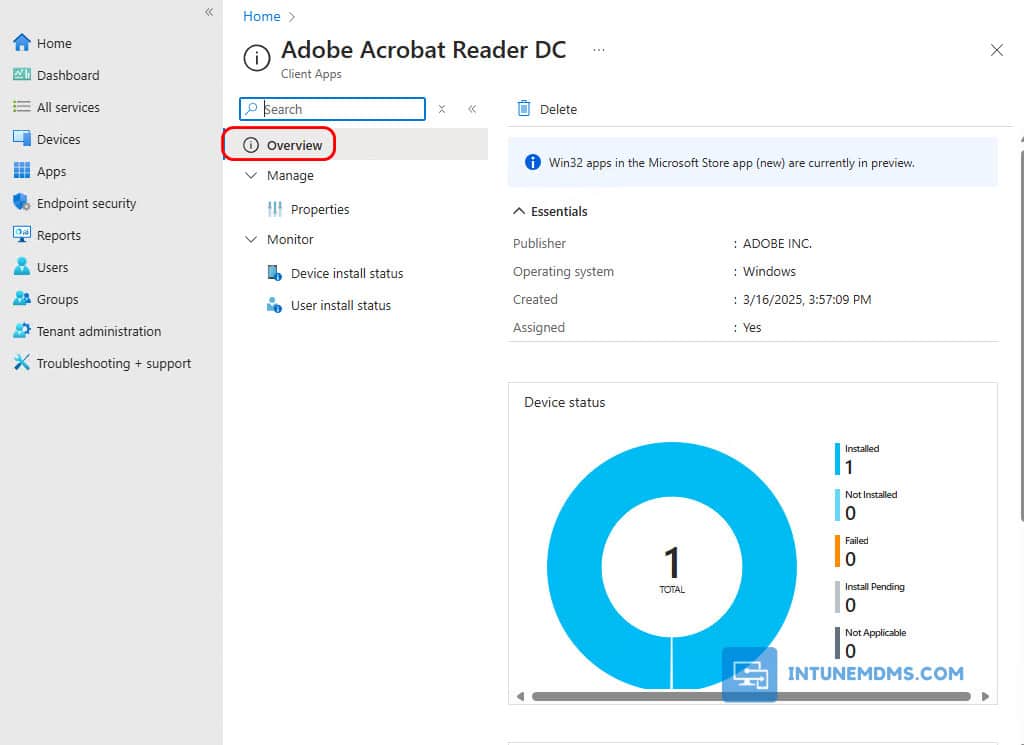
4. The Overview page provides a graphical breakdown, including devices with successful installations, devices still installing, and any errors encountered.
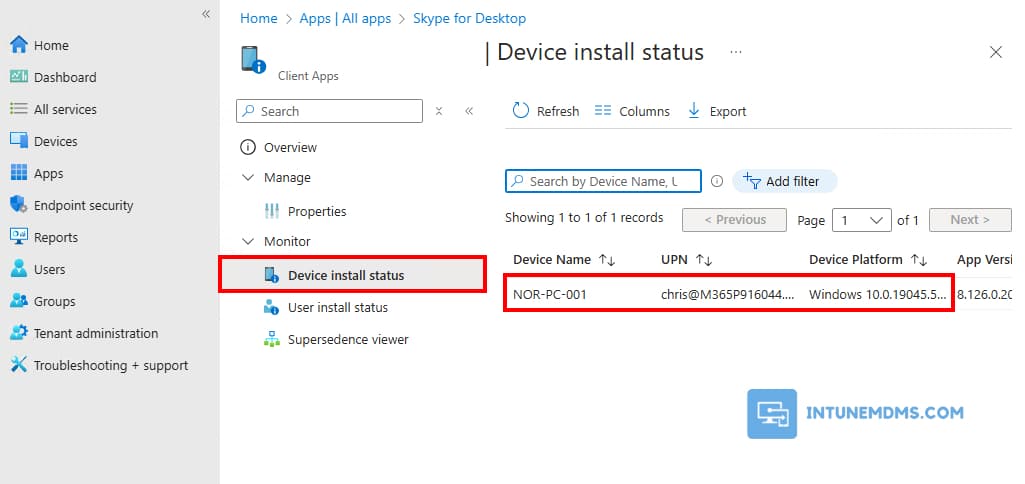
4. Click on Device install status or User install status, we will be able to see list of devices or users with installation status shown.
Related post: How To Monitor App Deployment Using Microsoft Intune.
Uninstall the app using Microsoft Intune
Anytime, if the app is no longer needed. You can uninstall it using Intune automatically.
1. Log in to the Intune admin center, then navigate to Apps → All apps then select the app you want to remove from Intune remotely.
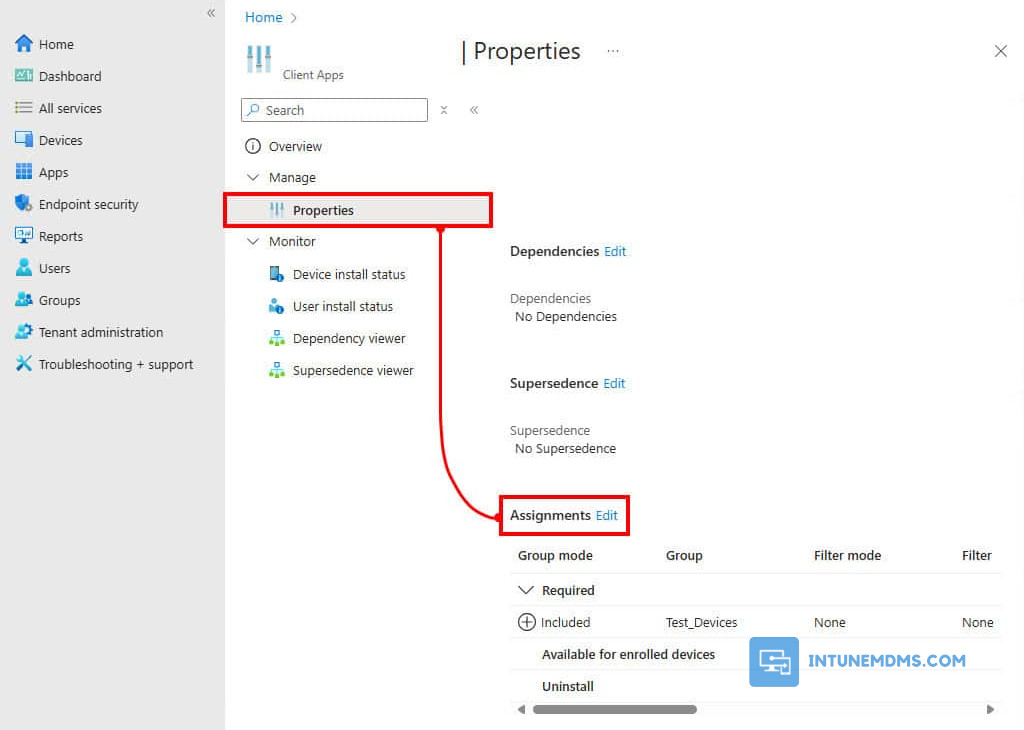
2. Go to Properties → Click on Edit next to Assignments
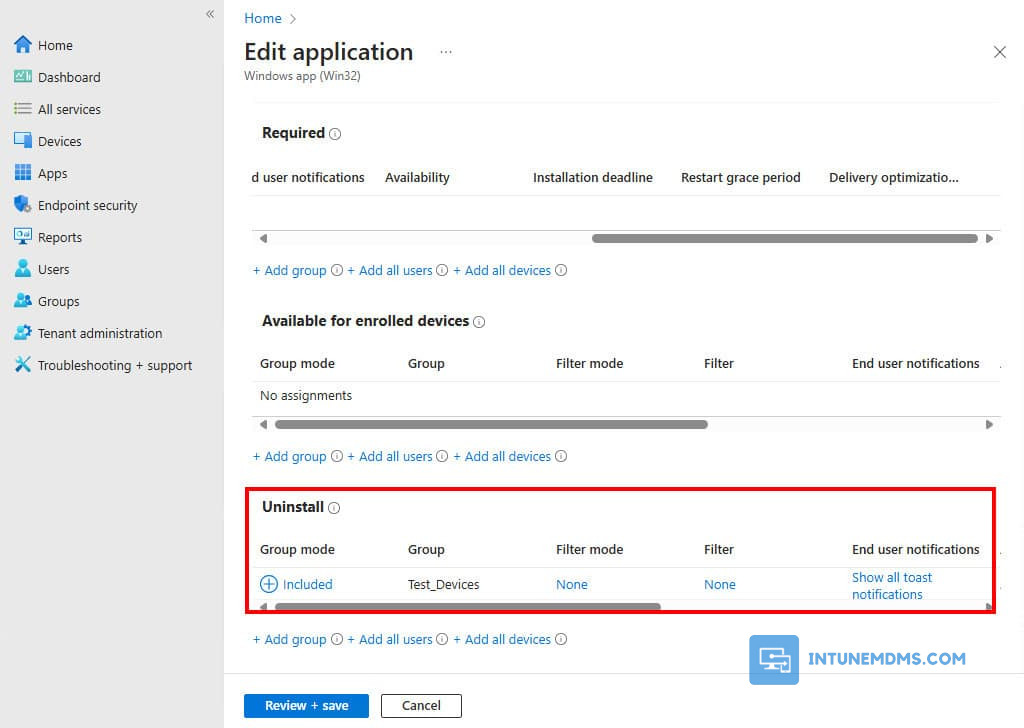
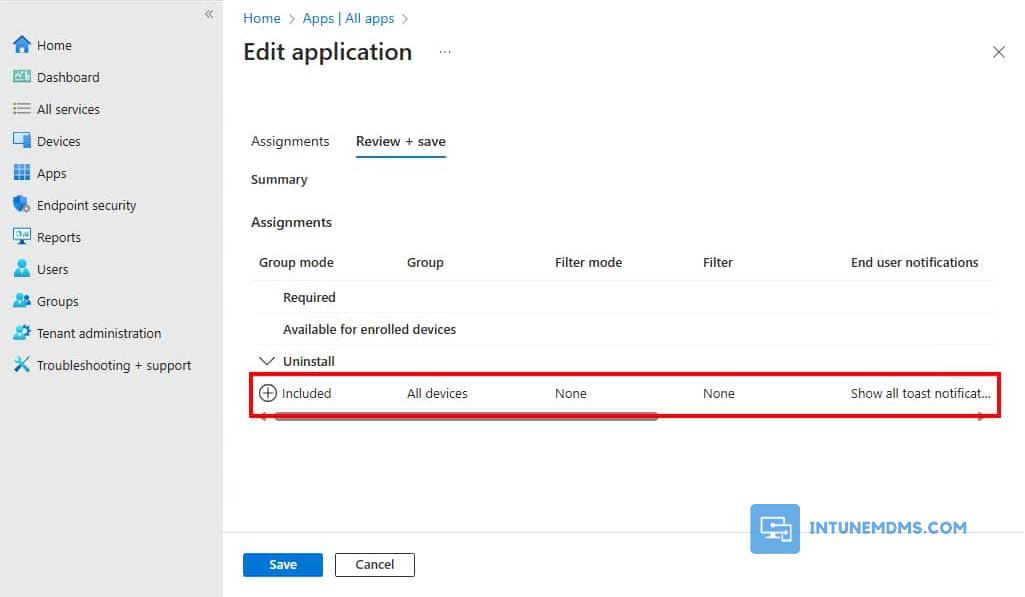
3. To uninstall the application, add a group in the Uninstall section. Ensure that the same user or device is not a part of the group which has been added to the Required section. For demo purpose, I’ve removed the test group from the Required section and add it into the Uninstall section.
4. Wait for the next Intune device check-in, or sync it manually to automatically remove the app.
